The lsblk command will list the block devices on a system, and by default also shows how Logical Volume Manager (LVM) devices map to physical devices:
$ lsblk
NAME                     MAJ:MIN RM   SIZE RO TYPE MOUNTPOINT
sda                        8:0    0 447.1G  0 disk
└─sda1                     8:1    0 447.1G  0 part
  ├─vg--awe-swap         254:1    0   4.7G  0 lvm  [SWAP]
  ├─vg--awe-home         254:4    0  37.3G  0 lvm  /home
  ├─vg--awe-tmp          254:2    0   9.3G  0 lvm  /tmp
  ├─vg--awe-root         254:0    0    28G  0 lvm  /
  ├─vg--awe-guest_orange 254:5    0    20G  0 lvm
  └─vg--awe-var
If you’d like the full device paths, add -p (--paths):
$ lsblk -p
NAME                                 MAJ:MIN RM   SIZE RO TYPE MOUNTPOINT
/dev/sda                               8:0    0 447.1G  0 disk
└─/dev/sda1                            8:1    0 447.1G  0 part
  ├─/dev/mapper/vg--awe-swap         254:1    0   4.7G  0 lvm  [SWAP]
  ├─/dev/mapper/vg--awe-home         254:4    0  37.3G  0 lvm  /home
  ├─/dev/mapper/vg--awe-tmp          254:2    0   9.3G  0 lvm  /tmp
  ├─/dev/mapper/vg--awe-root         254:0    0    28G  0 lvm  /
  ├─/dev/mapper/vg--awe-guest_orange 254:5    0    20G  0 lvm
  └─/dev/mapper/vg--awe-var
Parsing disk layout with a shell script
To parse this information in a script, the -P (--pairs) option is helpful:
$ lsblk -P
NAME="sda" MAJ:MIN="8:0" RM="0" SIZE="447.1G" RO="0" TYPE="disk" MOUNTPOINT=""
NAME="sda1" MAJ:MIN="8:1" RM="0" SIZE="447.1G" RO="0" TYPE="part" MOUNTPOINT=""
NAME="vg--awe-swap" MAJ:MIN="254:1" RM="0" SIZE="4.7G" RO="0" TYPE="lvm" MOUNTPOINT="[SWAP]"
NAME="vg--awe-home" MAJ:MIN="254:4" RM="0" SIZE="37.3G" RO="0" TYPE="lvm" MOUNTPOINT="/home"
NAME="vg--awe-tmp" MAJ:MIN="254:2" RM="0" SIZE="9.3G" RO="0" TYPE="lvm" MOUNTPOINT="/tmp"
NAME="vg--awe-root" MAJ:MIN="254:0" RM="0" SIZE="28G" RO="0" TYPE="lvm" MOUNTPOINT="/"
NAME="vg--awe-guest_orange" MAJ:MIN="254:5" RM="0" SIZE="20G" RO="0" TYPE="lvm" MOUNTPOINT=""
NAME="vg--awe-var" MAJ:MIN="254:3" RM="0" SIZE="28G" RO="0" TYPE="lvm" MOUNTPOINT="/var"
Examining raid and LVM disk layout
The command becomes really useful when analysing a more complex disk layout. The system below has six disks as follows:
sda2andsdb2are a RAID-1 (mirrored) pair that are used to provide a/bootpartition. This partition is not part of LVM.sda3andsdb3are a RAID-1 pair used with LVM- Two more RAID-1 pairs, used within LVM, are made up from
sdc1withsdd1, andsde1withsdf1
This can be seen in the md RAID configuration:
$ cat /proc/mdstat
Personalities : [raid1]
md3 : active raid1 sde1[2] sdf1[1]
      3907016512 blocks super 1.0 [2/2] [UU]
      bitmap: 0/30 pages [0KB], 65536KB chunk

md2 : active raid1 sda3[0] sdb3[1]
      1953307456 blocks super 1.0 [2/2] [UU]
      bitmap: 0/15 pages [0KB], 65536KB chunk

md1 : active raid1 sda2[3] sdb2[2]
      204608 blocks super 1.2 [2/2] [UU]

md5 : active raid1 sdc1[0] sdd1[1]
      1953513280 blocks super 1.0 [2/2] [UU]
      bitmap: 1/15 pages [4KB], 65536KB chunk

unused devices: <none>
The three LVM raid Physical Volumes have been combined to form one Volume Group (note the ‘3’ under ‘#PV’):
# vgs
  VG   #PV #LV #SN Attr   VSize VFree
  vg0    3   6   0 wz--n- 7.28t 3.53t
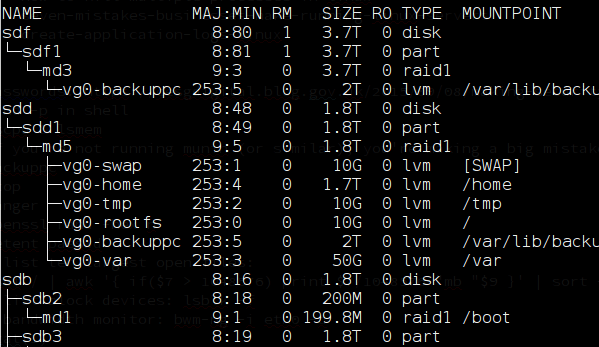
On this server, the lsblk command gives a very good overview of how the physical devices, RAID devices and Volume Groups all fit together:
$ lsblk
NAME               MAJ:MIN RM   SIZE RO TYPE  MOUNTPOINT
sdf                  8:80   1   3.7T  0 disk
└─sdf1               8:81   1   3.7T  0 part
  └─md3              9:3    0   3.7T  0 raid1
    └─vg0-backuppc 253:5    0     2T  0 lvm   /var/lib/backuppc
sdd                  8:48   0   1.8T  0 disk
└─sdd1               8:49   0   1.8T  0 part
  └─md5              9:5    0   1.8T  0 raid1
    ├─vg0-swap     253:1    0    10G  0 lvm   [SWAP]
    ├─vg0-home     253:4    0   1.7T  0 lvm   /home
    ├─vg0-tmp      253:2    0    10G  0 lvm   /tmp
    ├─vg0-rootfs   253:0    0    10G  0 lvm   /
    ├─vg0-backuppc 253:5    0     2T  0 lvm   /var/lib/backuppc
    └─vg0-var      253:3    0    50G  0 lvm   /var
sdb                  8:16   0   1.8T  0 disk
├─sdb2               8:18   0   200M  0 part
│ └─md1              9:1    0 199.8M  0 raid1 /boot
├─sdb3               8:19   0   1.8T  0 part
│ └─md2              9:2    0   1.8T  0 raid1
│   ├─vg0-home     253:4    0   1.7T  0 lvm   /home
│   └─vg0-backuppc 253:5    0     2T  0 lvm   /var/lib/backuppc
└─sdb1               8:17   0     1M  0 part
sde                  8:64   1   3.7T  0 disk
└─sde1               8:65   1   3.7T  0 part
  └─md3              9:3    0   3.7T  0 raid1
    └─vg0-backuppc 253:5    0     2T  0 lvm   /var/lib/backuppc
sdc                  8:32   0   1.8T  0 disk
└─sdc1               8:33   0   1.8T  0 part
  └─md5              9:5    0   1.8T  0 raid1
    ├─vg0-swap     253:1    0    10G  0 lvm   [SWAP]
    ├─vg0-home     253:4    0   1.7T  0 lvm   /home
    ├─vg0-tmp      253:2    0    10G  0 lvm   /tmp
    ├─vg0-rootfs   253:0    0    10G  0 lvm   /
    ├─vg0-backuppc 253:5    0     2T  0 lvm   /var/lib/backuppc
    └─vg0-var      253:3    0    50G  0 lvm   /var
sda                  8:0    0   1.8T  0 disk
├─sda2               8:2    0   200M  0 part
│ └─md1              9:1    0 199.8M  0 raid1 /boot
├─sda3               8:3    0   1.8T  0 part
│ └─md2              9:2    0   1.8T  0 raid1
│   ├─vg0-home     253:4    0   1.7T  0 lvm   /home
│   └─vg0-backuppc 253:5    0     2T  0 lvm   /var/lib/backuppc
└─sda1               8:1    0     1M  0 part
There are other commands that will give more detail, but this is a good overview of how the various mount points are split across the underlying physical devices.
Could this Linux Tip be improved? Let us know in the comments below.

